
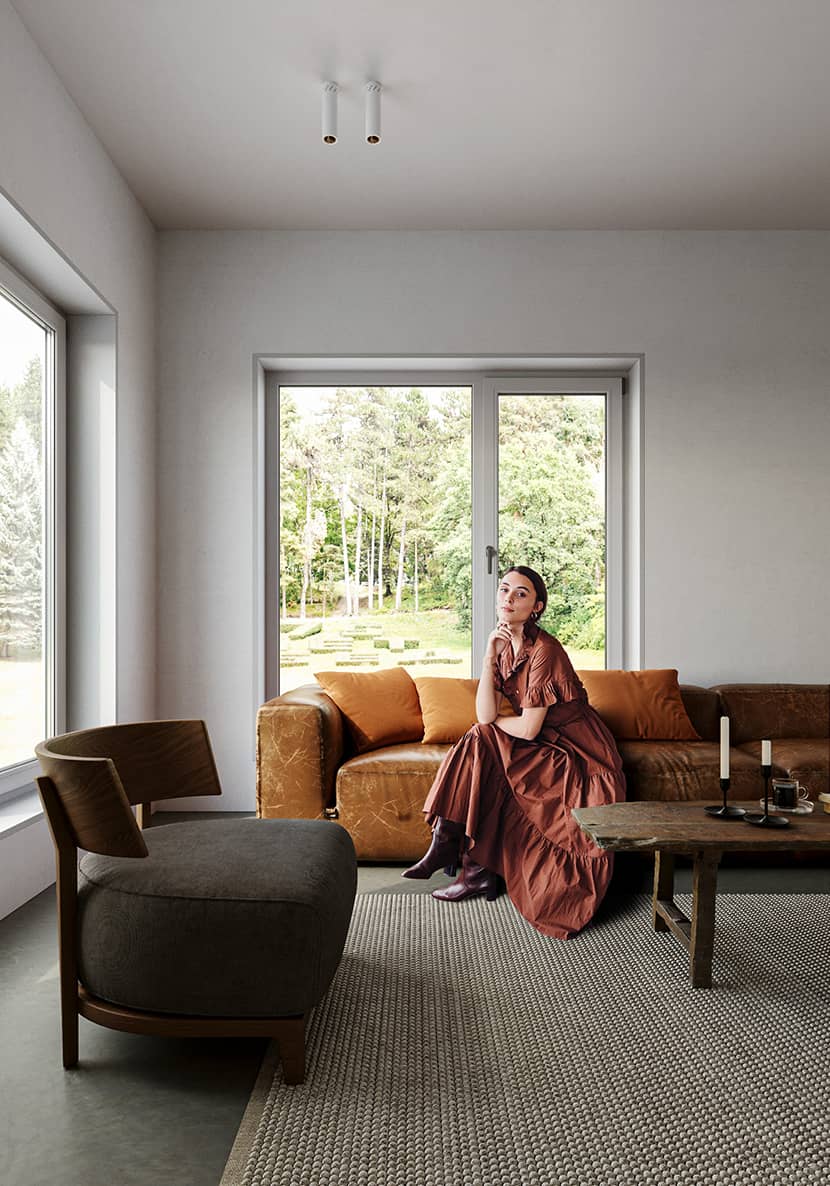
A good collection of reference images, an easy 3d modeling process, not-so-complicated materials, and a bit of color control through your frame buffer could be enough in order to create a pretty nice set of images like Zahedul Alam has done in his "Alone" project. Enjoy the article!
About me.
Hello everyone,
My name is Zahedul Alam and I’m a 3D artist from Bangladesh. I started my career as a product modeler before moving into the ArchViz industry in 2016. I always like to create architectural renderings, so two years later, I made the decision to invest my time in this industry. At the moment I am working as a freelance ArchViz artist, mainly focusing on interior and product visualization.
Software & Assets Used.
The main tools I usually use are 3DS Max for modeling, Corona Render for rendering, and Adobe Photoshop for post-production work.
In this scene, I used some ready-made models like a bed, sofa, and some decorative objects from 3DSky. Hdri comes from PGSkies.
References.
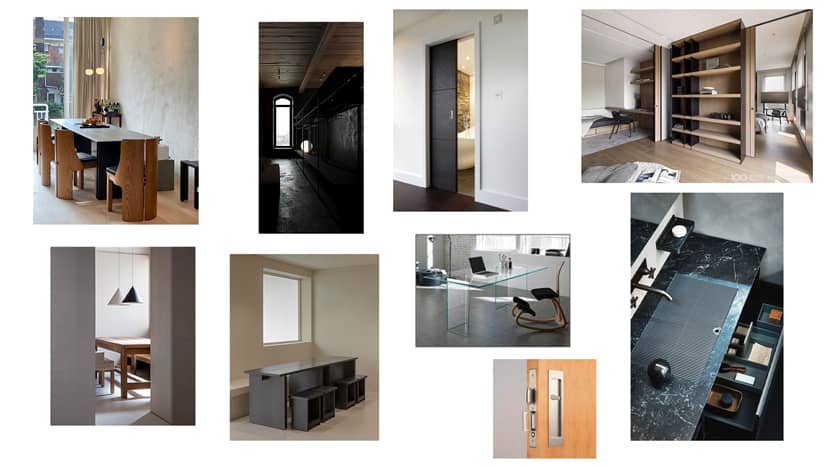
According to my opinion, one of the most important things before starting your project is to collect the proper reference images. I randomly saw some lovely images on my Instagram and Pinterest feeds. After that, I started collecting references related to this project. Here are some of them which I used as inspiration.
Modeling & Scene Setup.
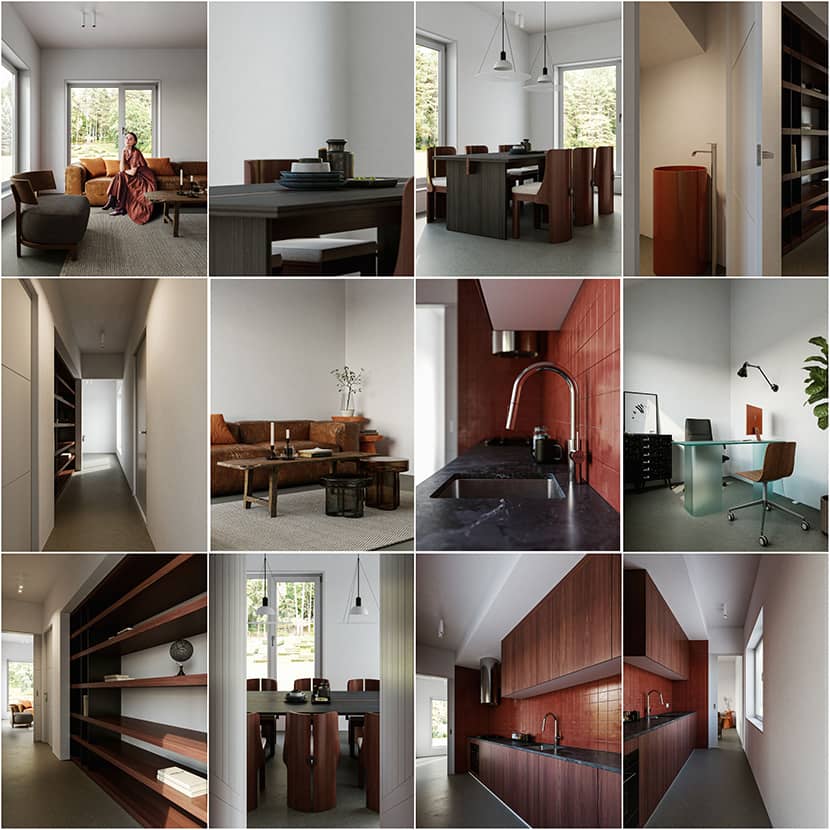
I always try to keep my modeling workflow clean and simple. It starts from a single plane then the wall applies a little amount of chamfer modifier to place windows, doors, furniture, and other decorative stuff. For qualitative images, the small and fine details are really important. I don’t know how much I achieved that. I didn’t change any settings from the render setting, just set the noise limit to 3.00 and denoising on.
Lighting.
For the lighting, I always use the Corona sun & sky. But this time I used an HDRI map. I tried multiple HDRIs from different sources but didn’t like the result. I finally found this one from PGskies and it came out nicely.
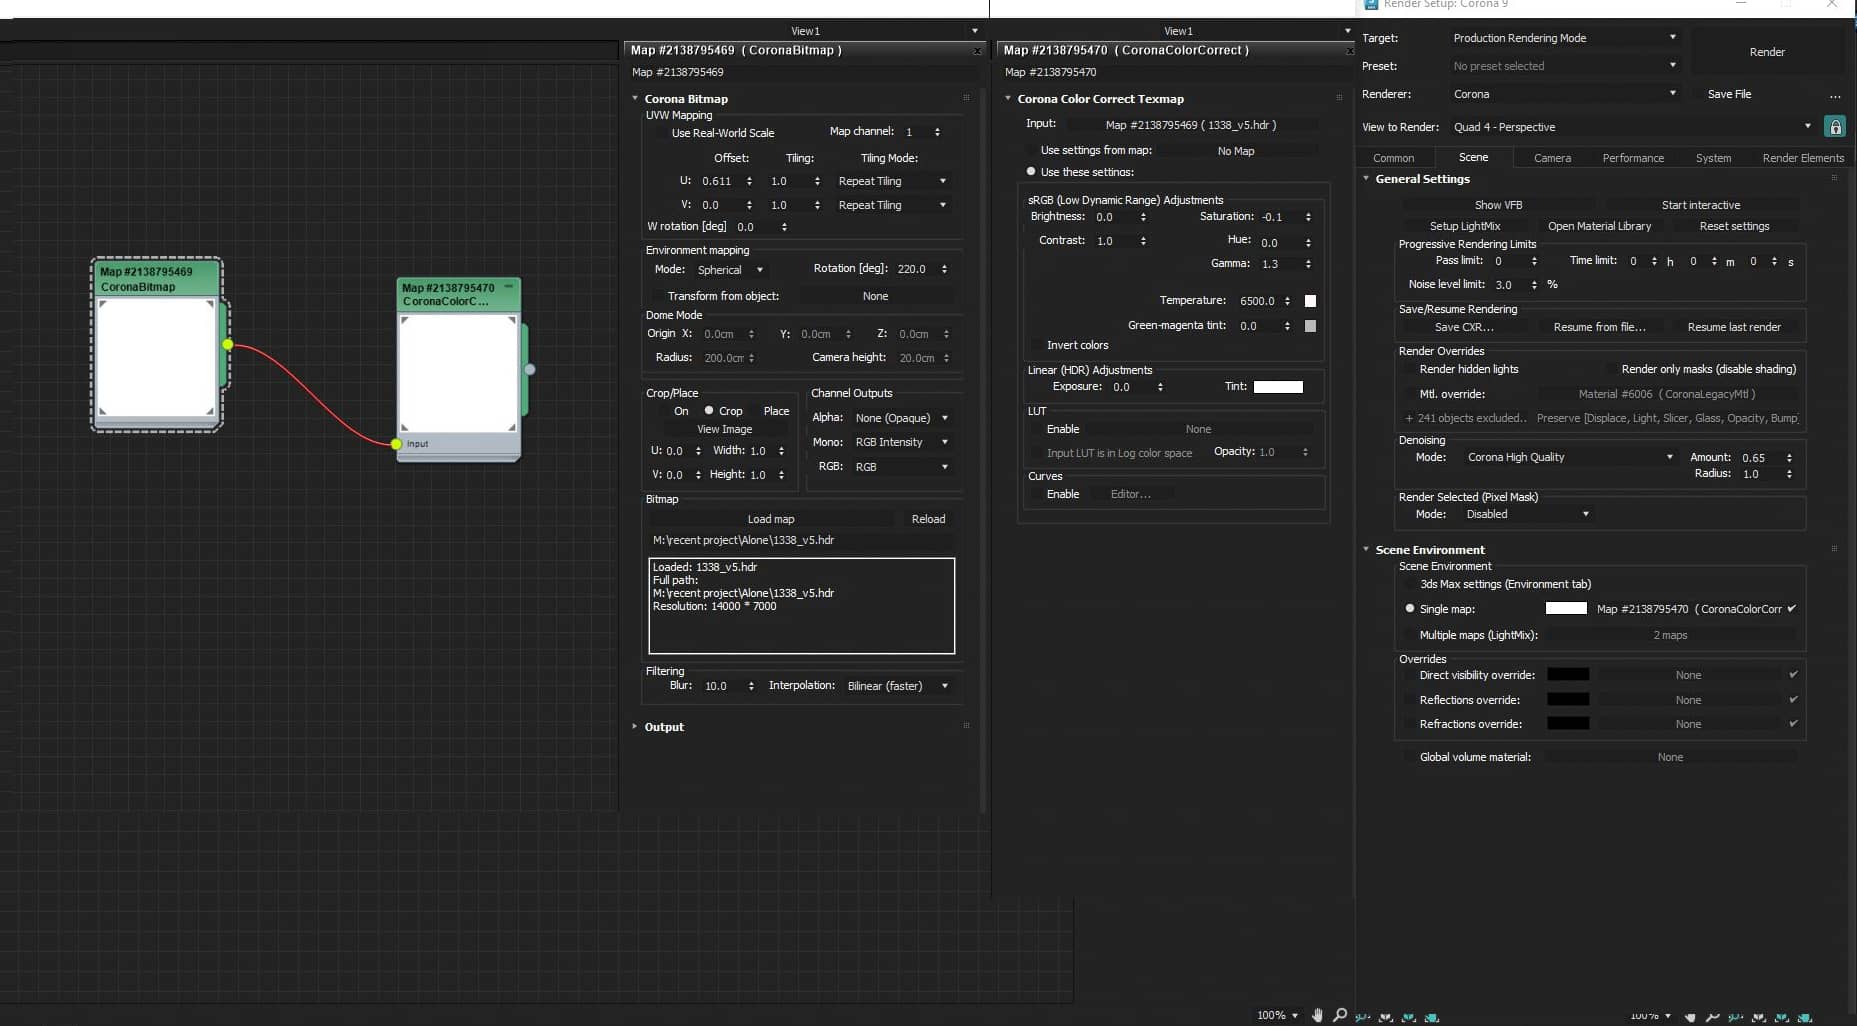
Hdri Setup: For softer shadows, I increased the blur value.
Backplate Setup: I used a single image as a backplate. If you use an extra backplate image for the background it's important to match color and brightness with your scene. I connect my backplate image with corona lightMtl and corona color correction map. I reduce the saturation and increase the gamma value slightly and turned off the emit light option from lightMtl. Make sure you turned off the cast and receive shadow from object properties otherwise, it will block light.
I also added a large ground plane with gray color material on it. It acts like a reflector and helps the light to bounce on the ceiling. Here are both HDRI and Backplate setups.

Materials.
I don’t follow the fancy material creation technique in all of my scenes. I keep my materials as simple as possible. I don’t use extra material nodes to achieve tiny details which are not visible in the camera. Nowadays render engines get better and more powerful. So, you don’t have to worry about creating fine detail material just play with color, texture, reflection, refraction, bump, and displacement.
Here are some materials I used for this project:
Ceiling Material.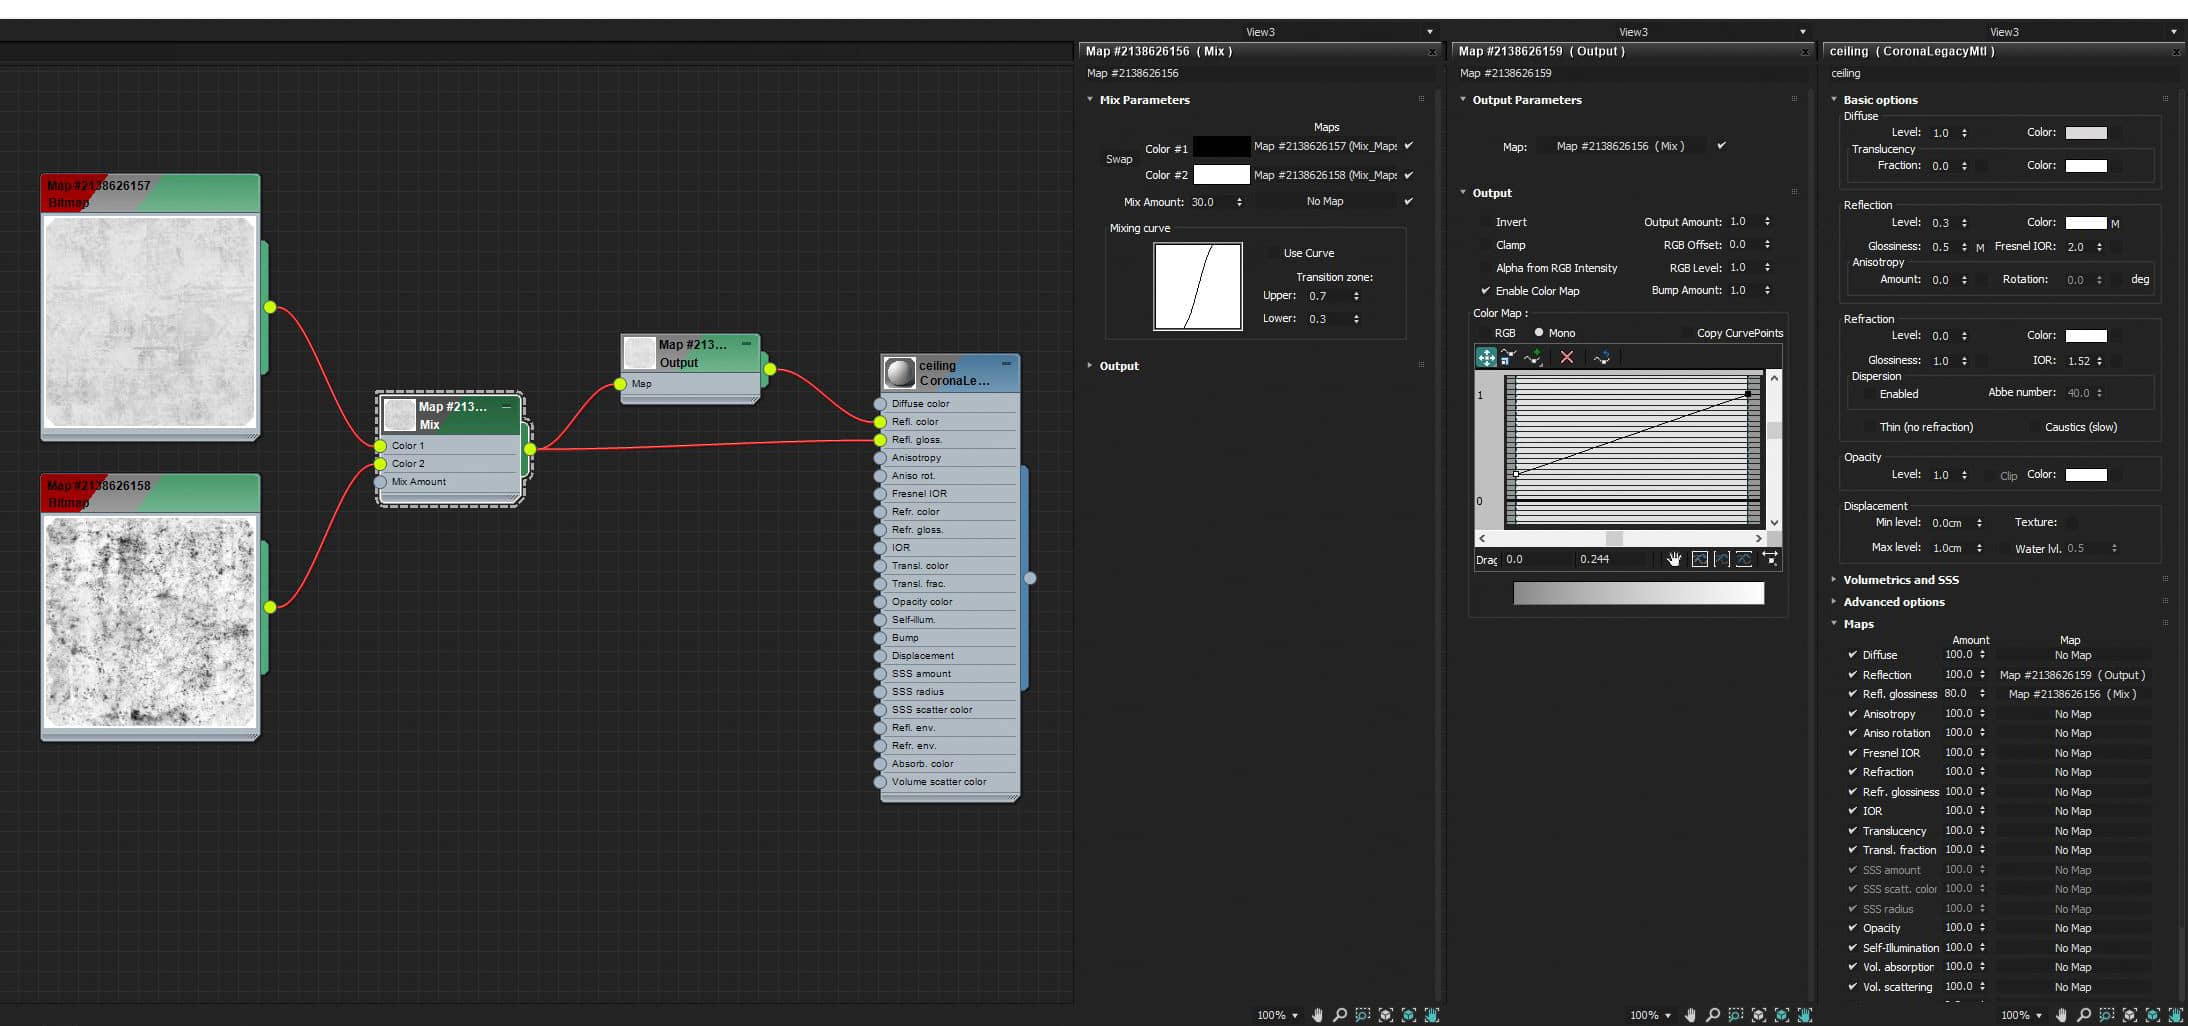
Floor material.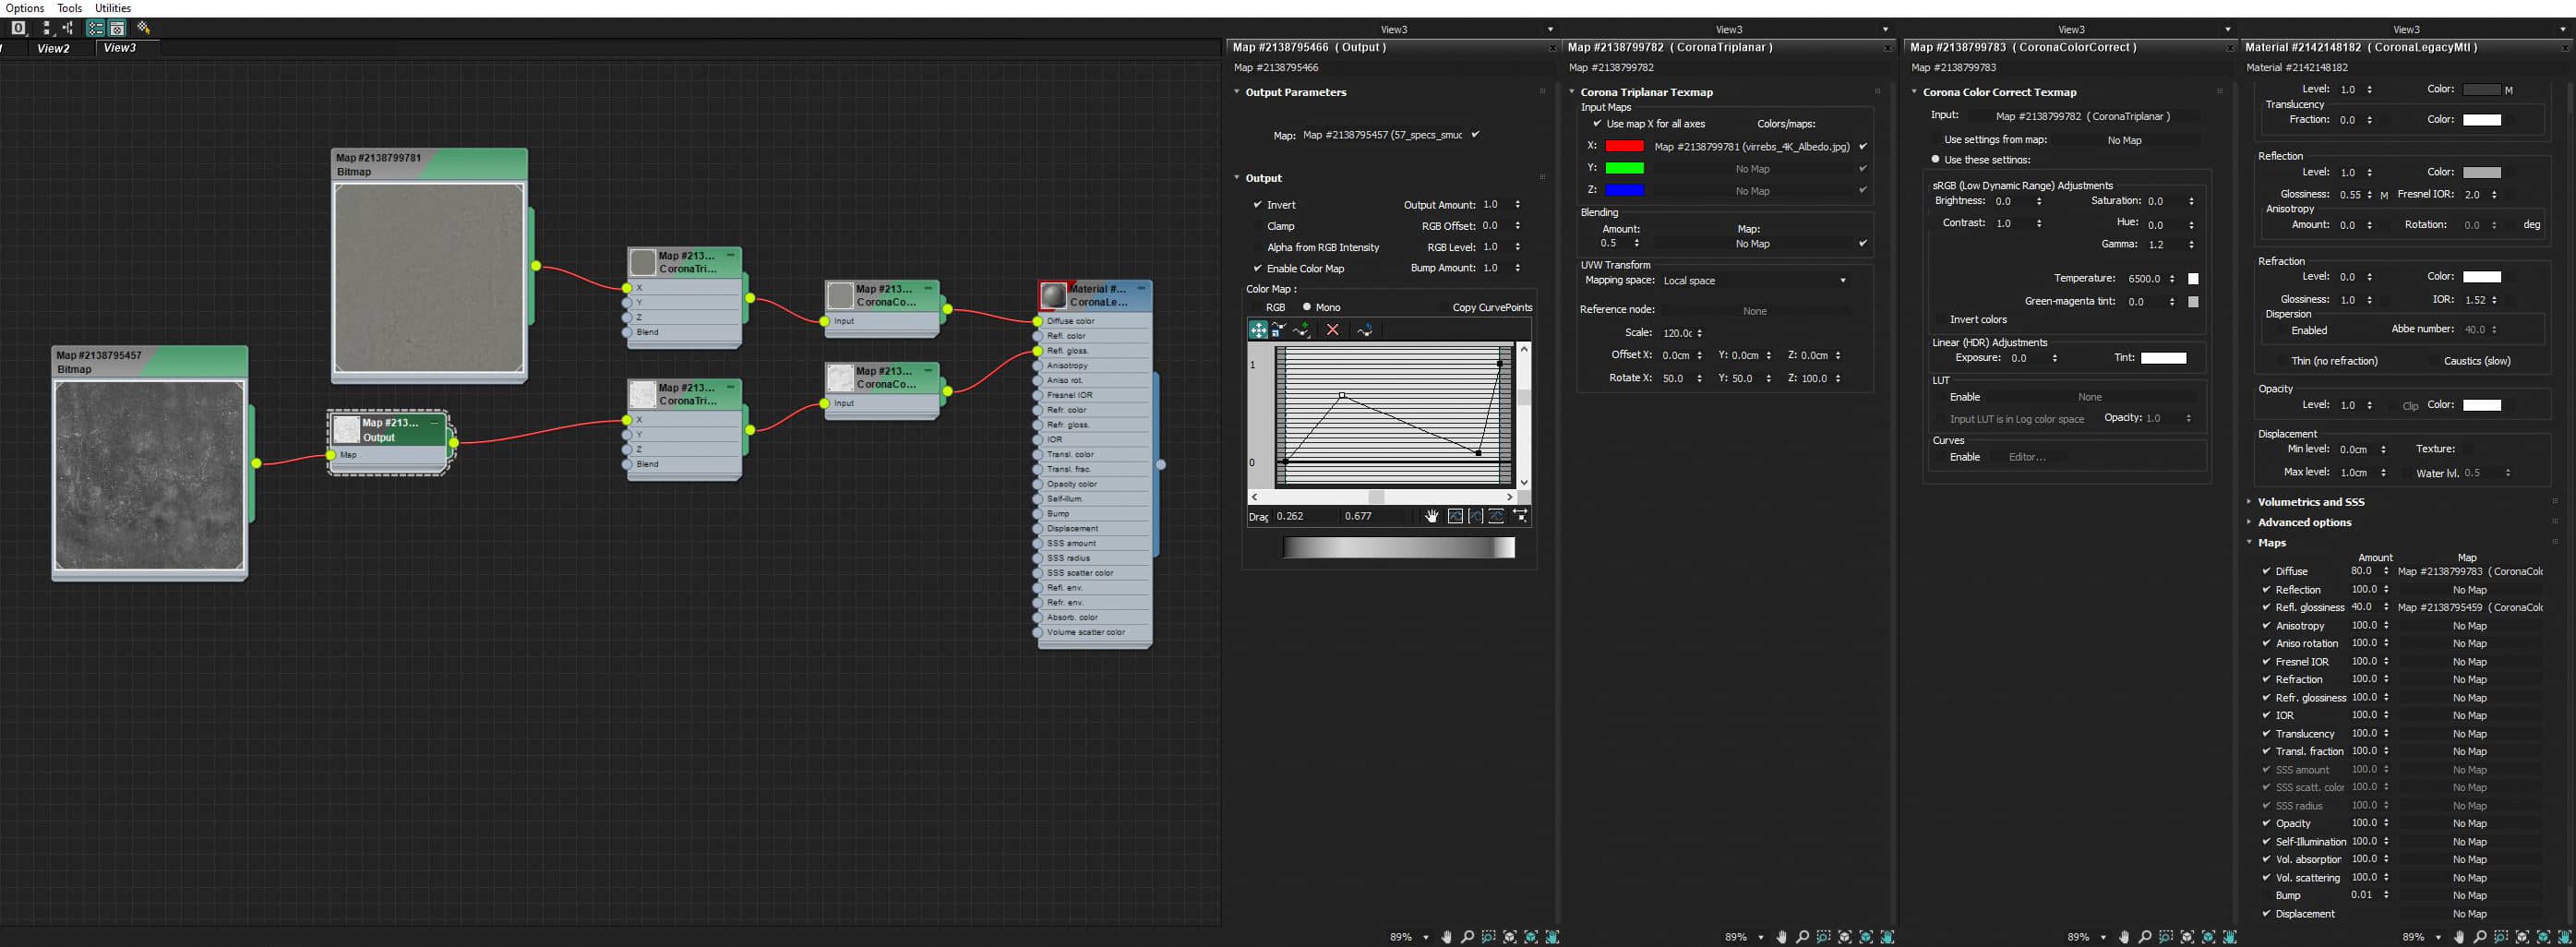
Kitchen Tiles.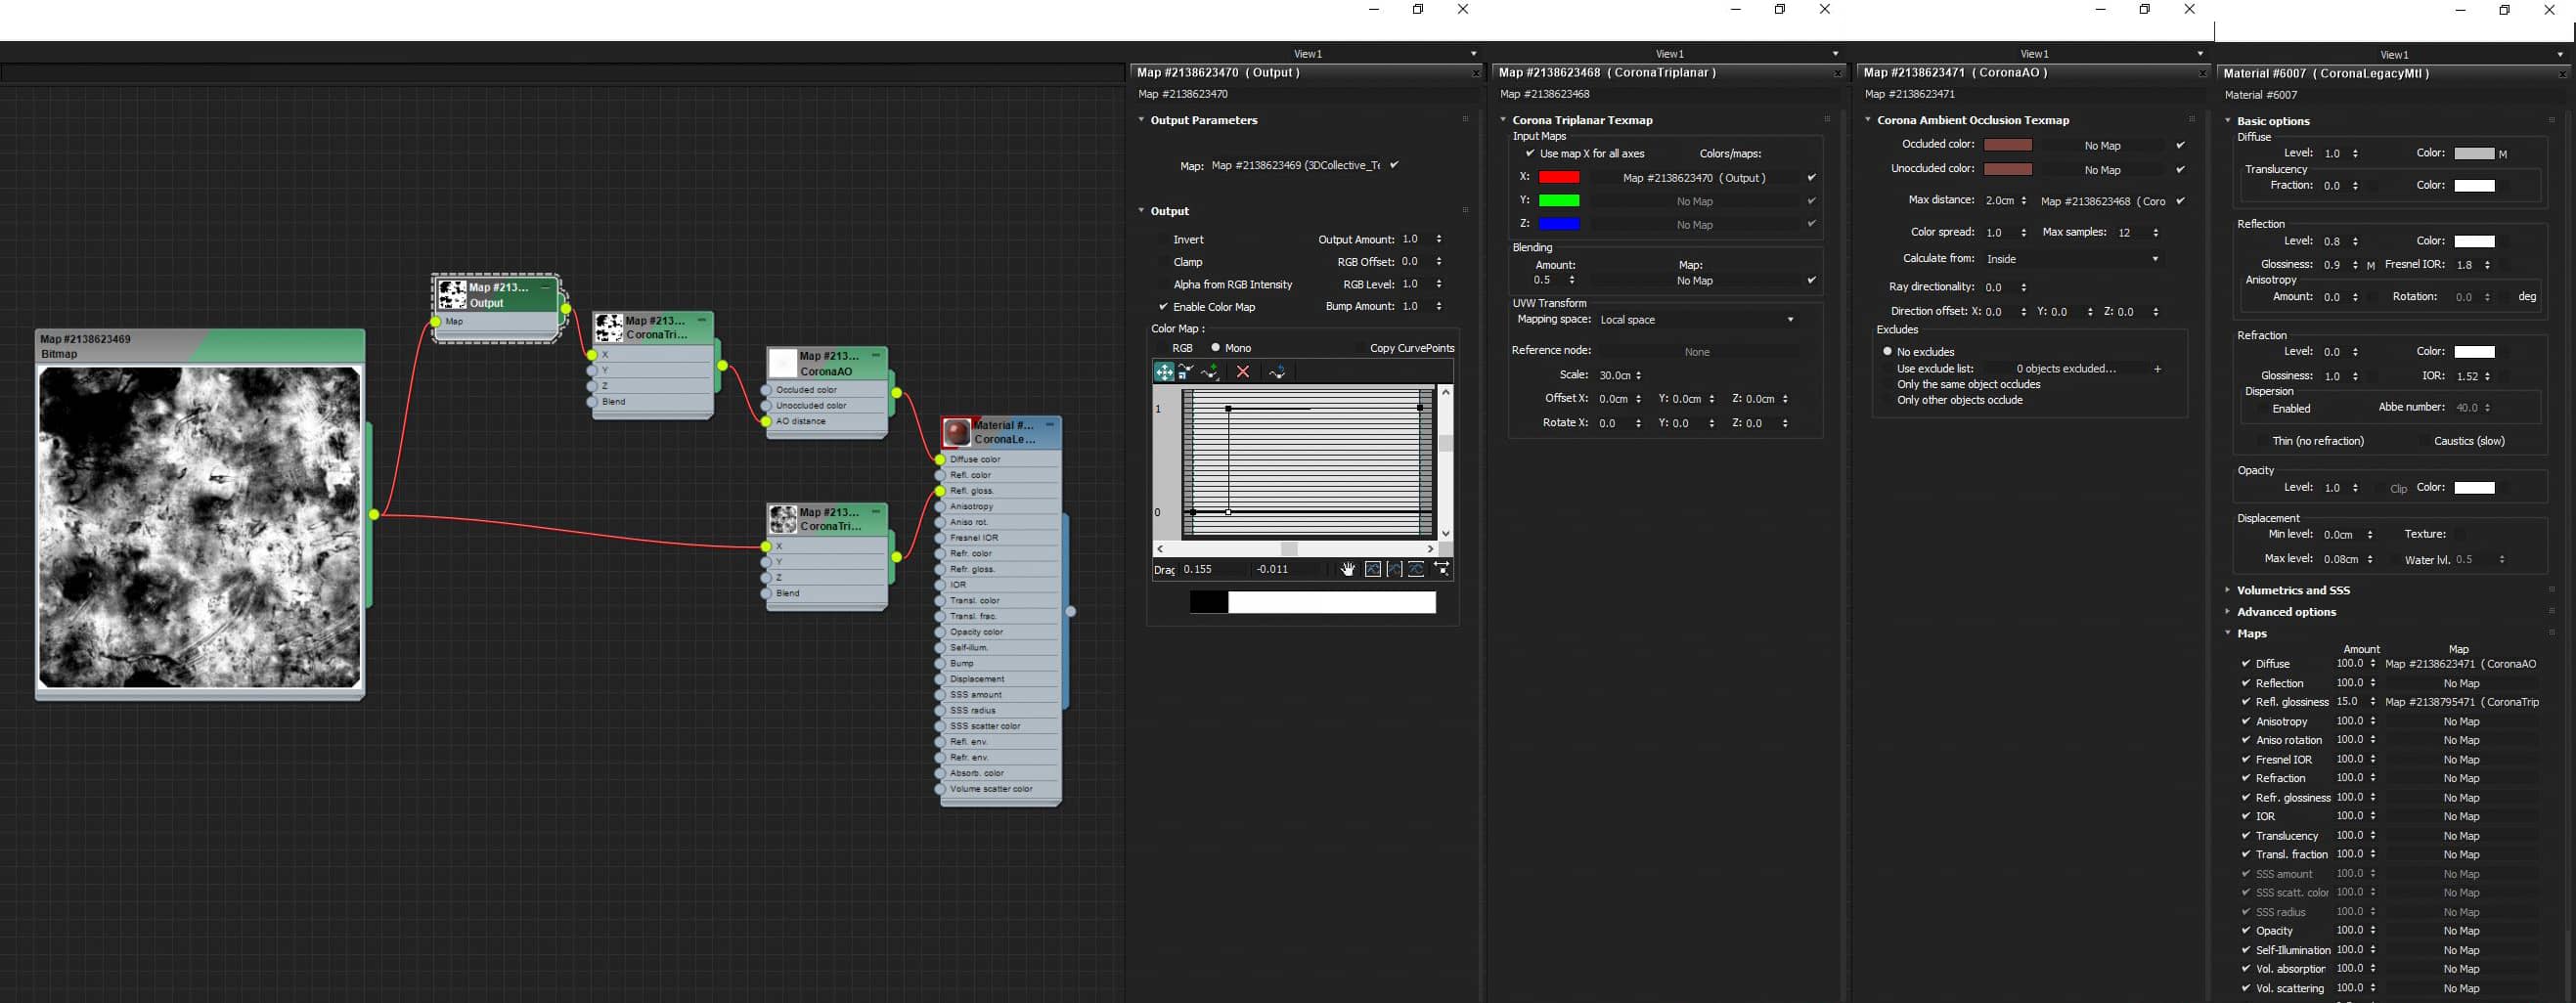
Main Wood.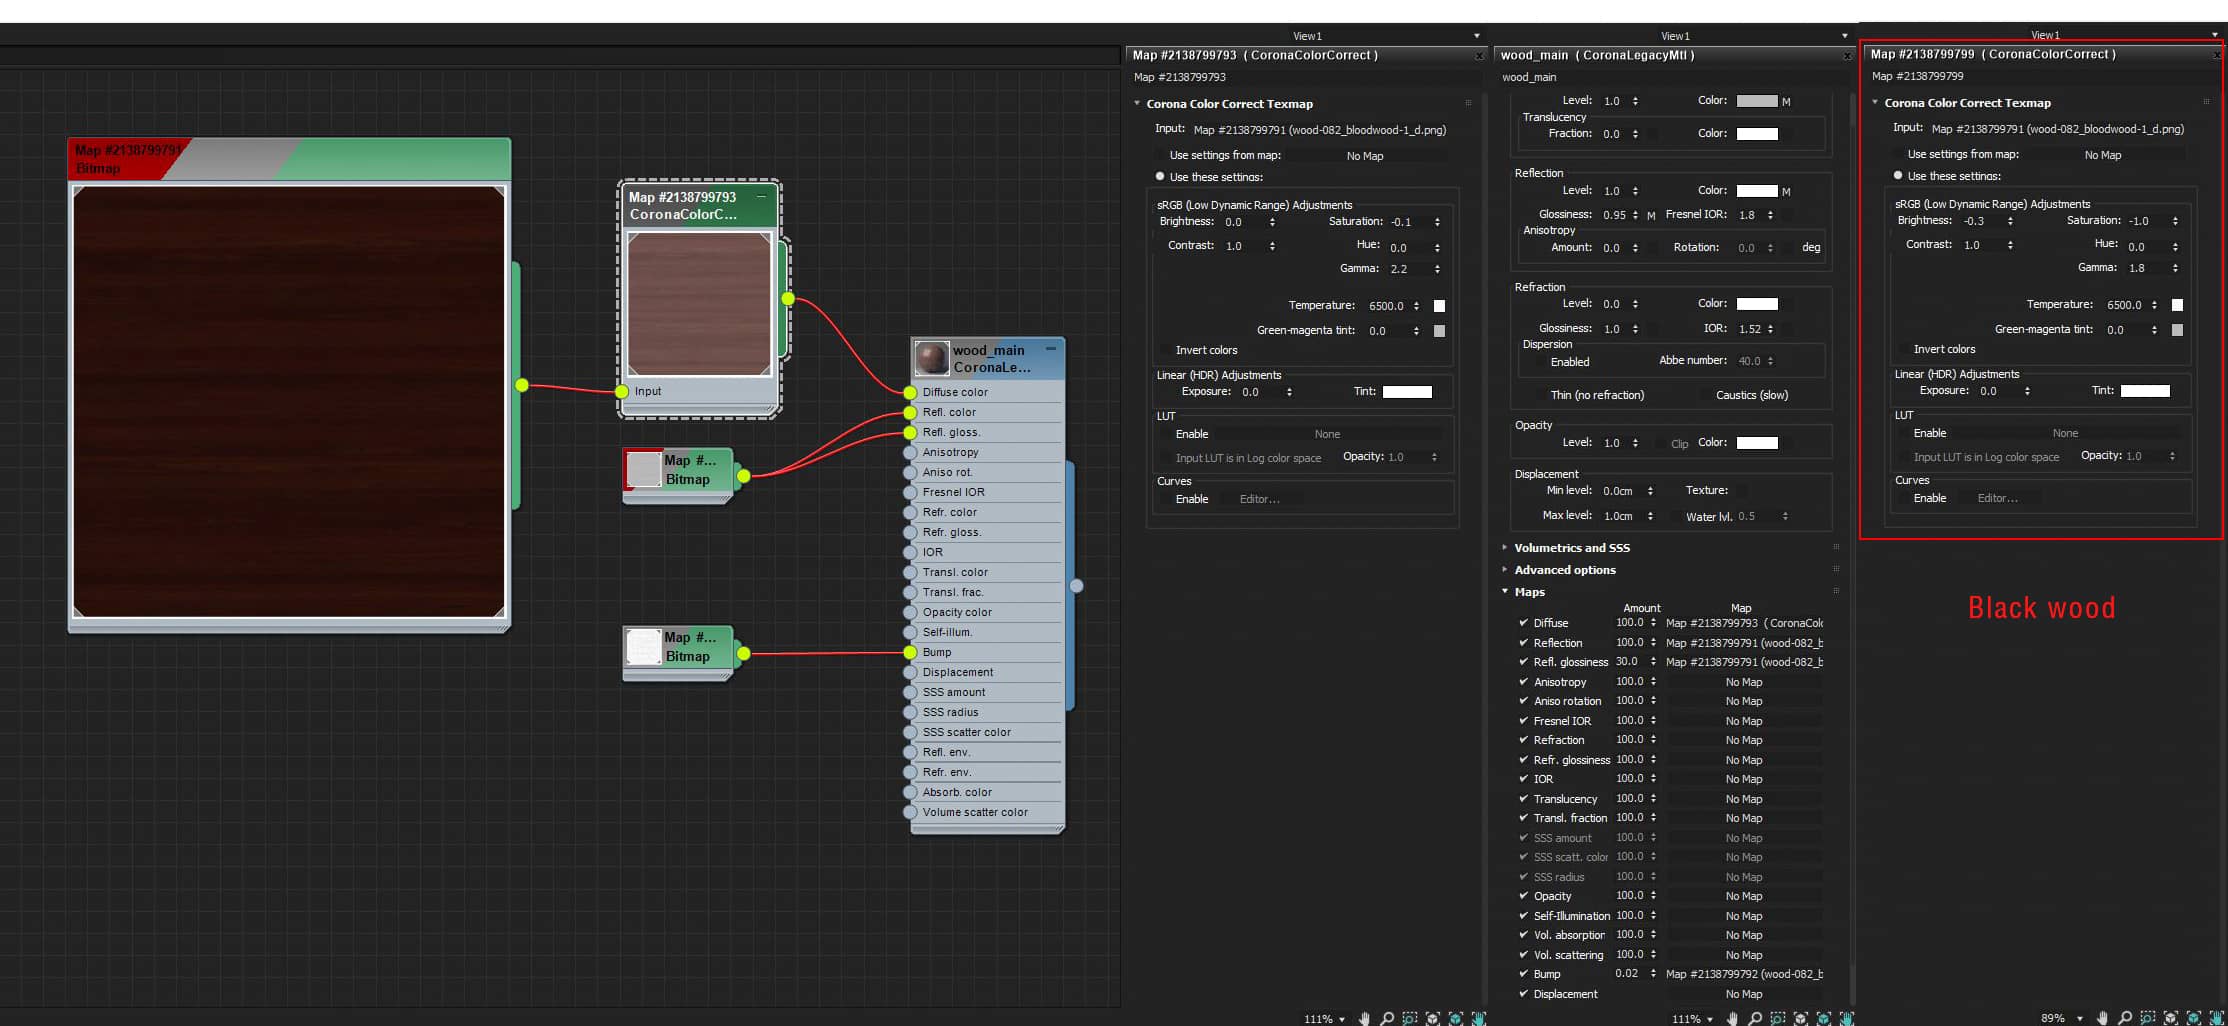
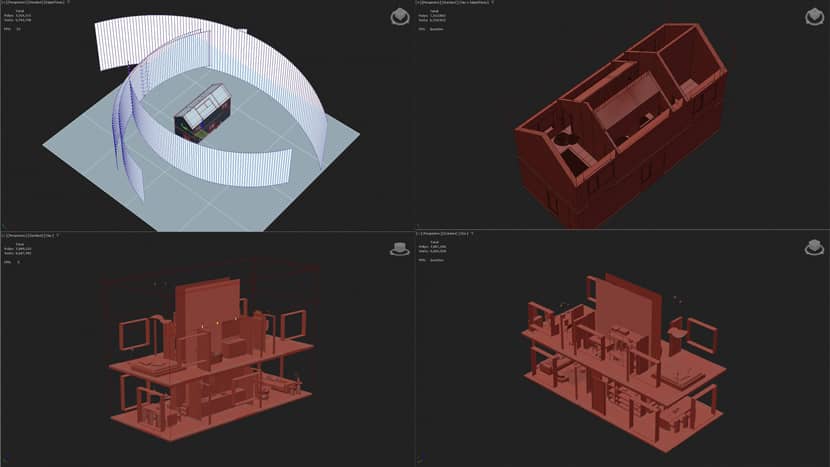
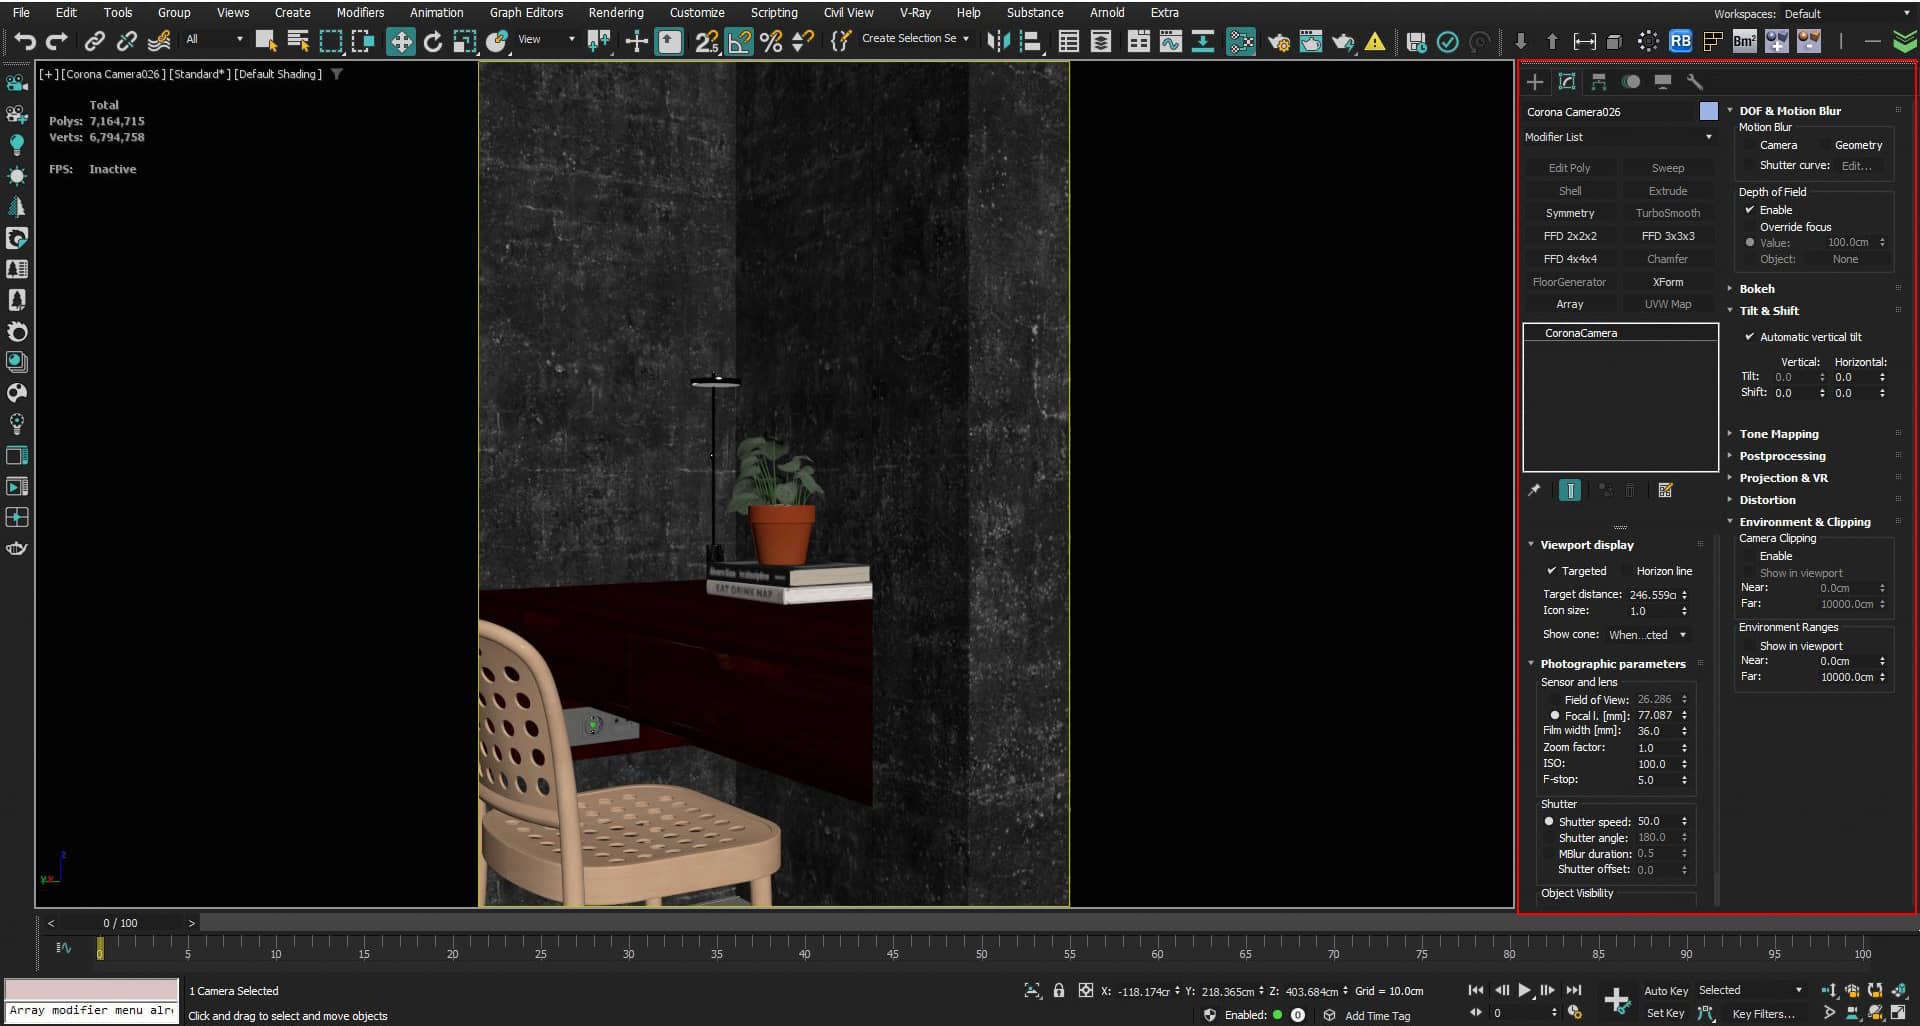
Camera Setup.
In this scene, I used total 24 cameras. You can check all of them out on VWArtclub *Group on Facebook.
I kept all camera settings the same just changing the Focal length from 18 to 85 mm. Some camera has DOF (Depth of Field) enabled with F-stop 5.0 and Tilt & Shift on.
Here is my camera setup:
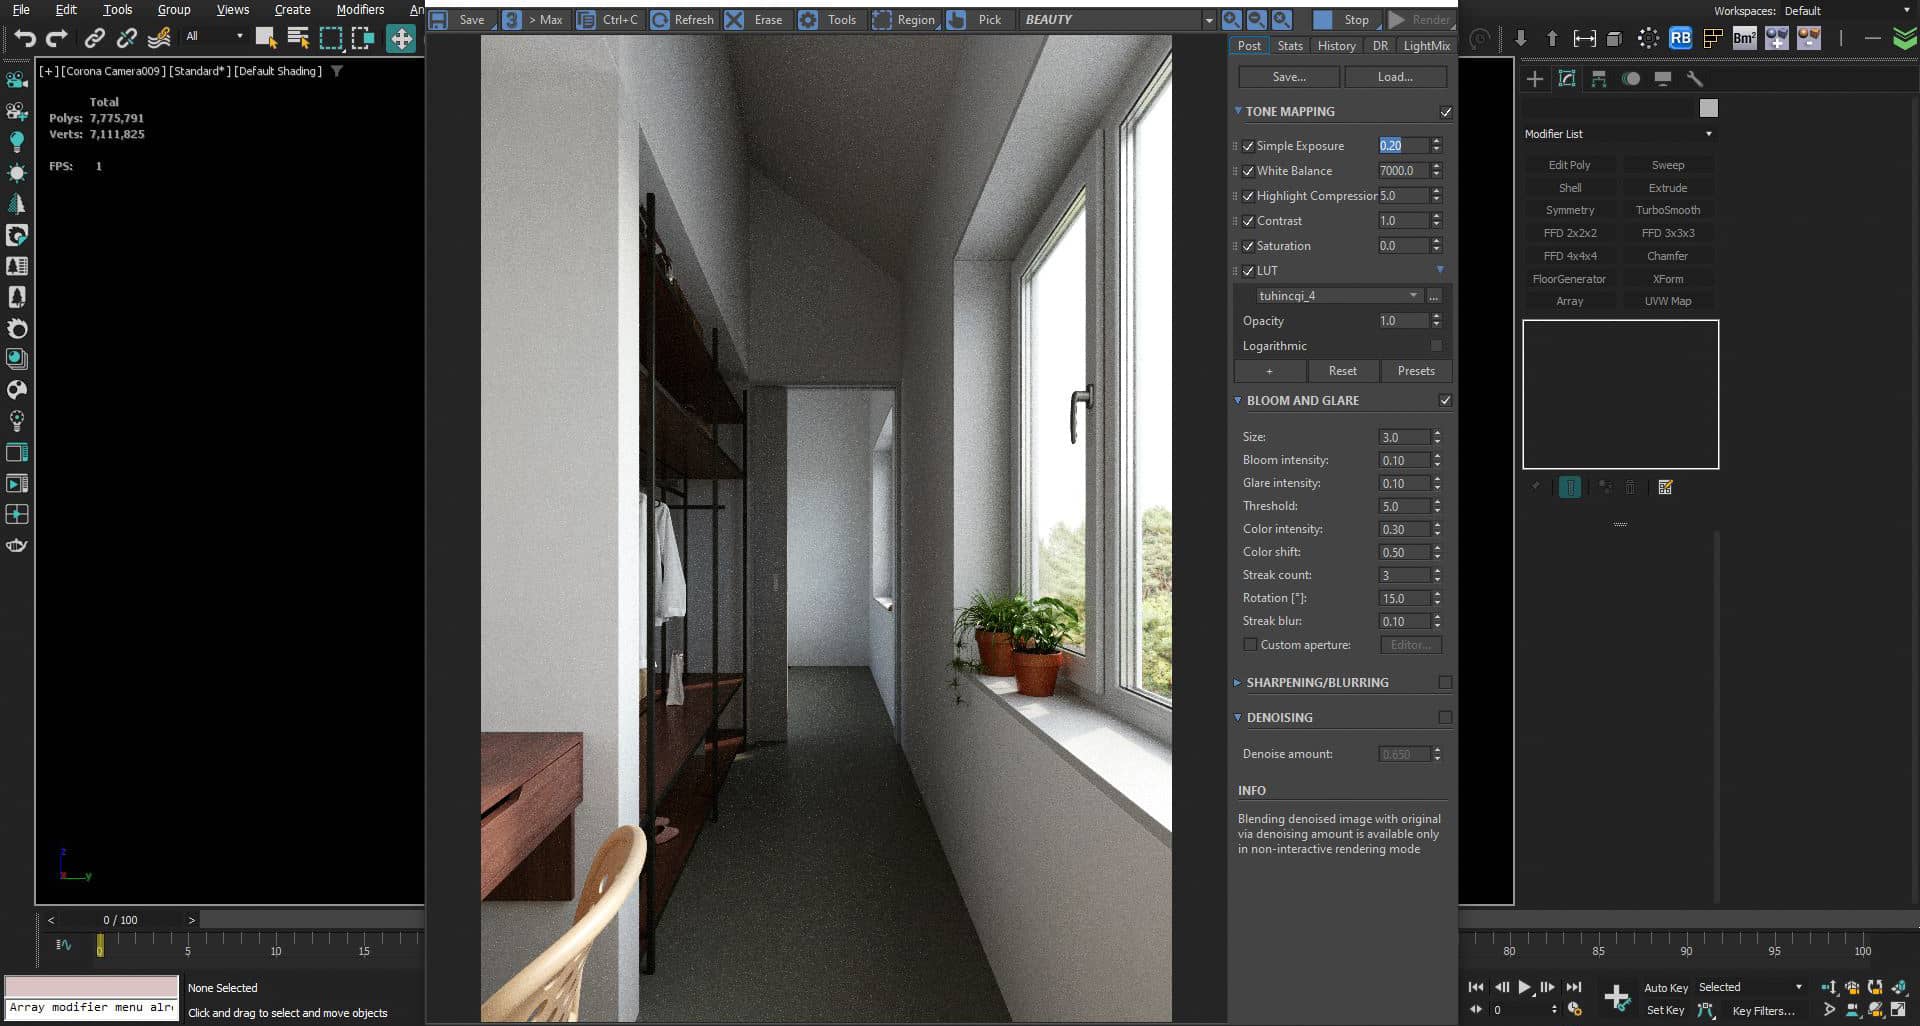
Rendering & Post-Production.
My post work is really simple. I always try to get the best possible result from the render engine. There are some slight things I do during the post-production process. Here are the tone map settings:
I used a custom lut (lookup table). If you want to know how to make your own lookup table you can follow this tutorial below. Using LUT can save time from post-processing work.
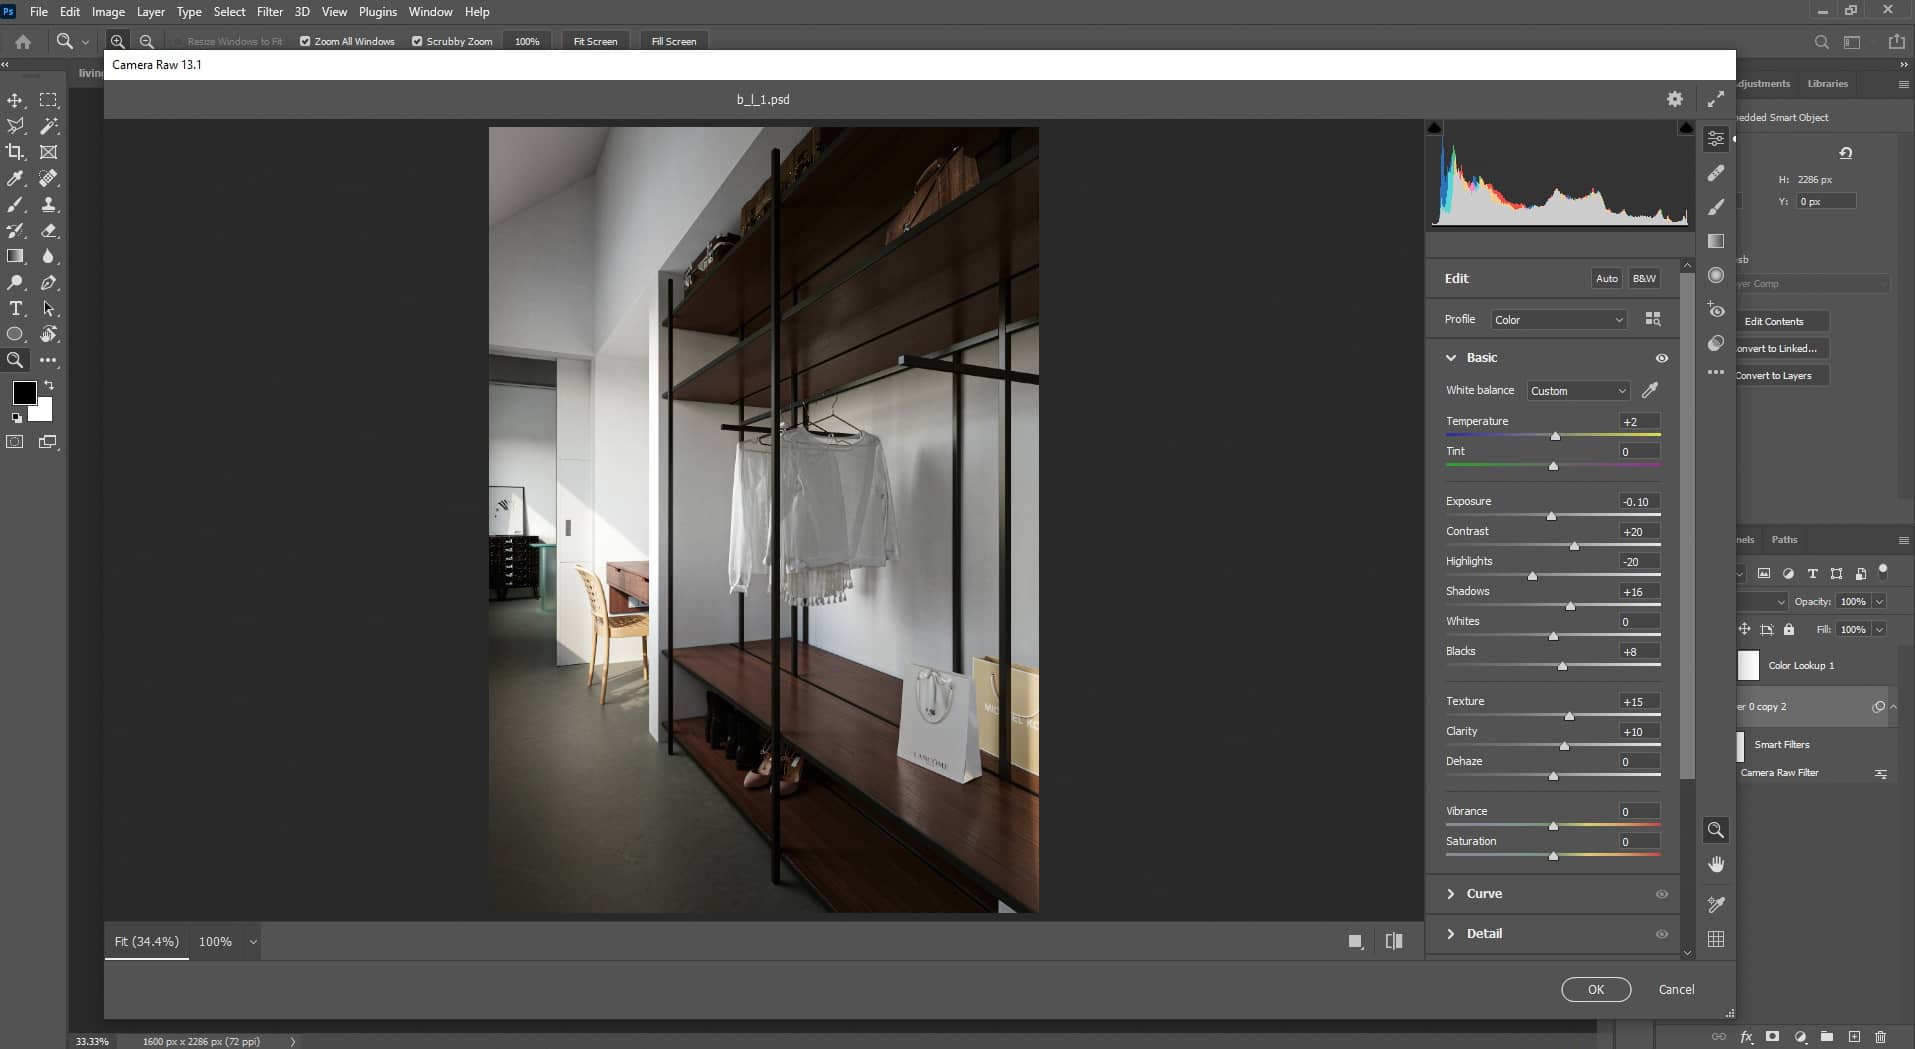
After finishing the render, I saved it in 16-bit tif format and I used Photoshop for the final adjustments. First, I opened the image with the camera raw filter applied and I saved my adjustments. Then I applied the same camera raw adjustments to all images saving them as .jpg or .png format and that’s it.
Camera Raw Adjustments:
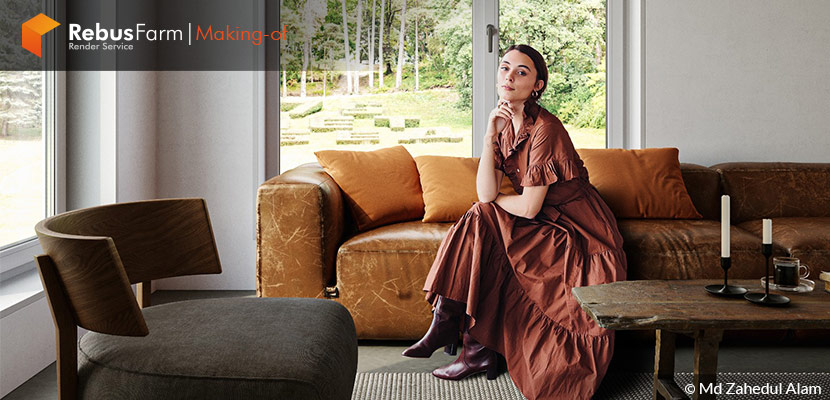
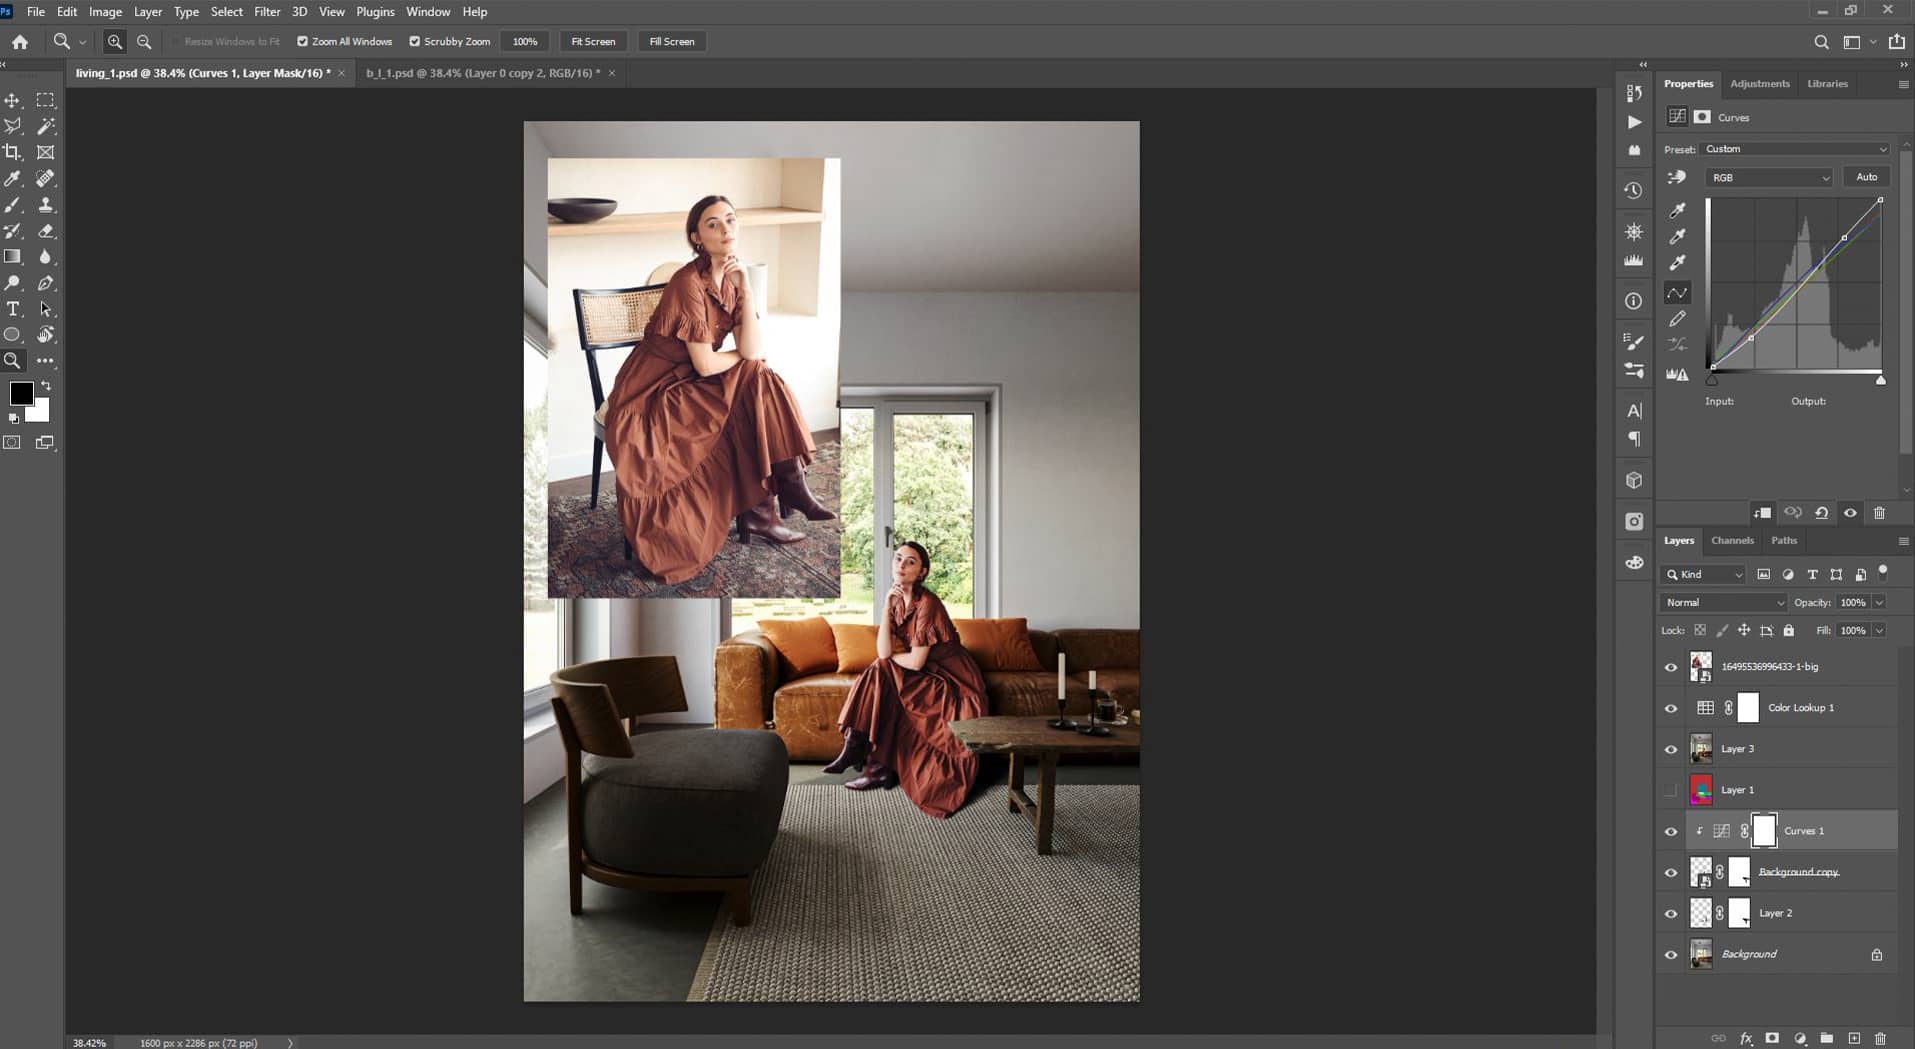
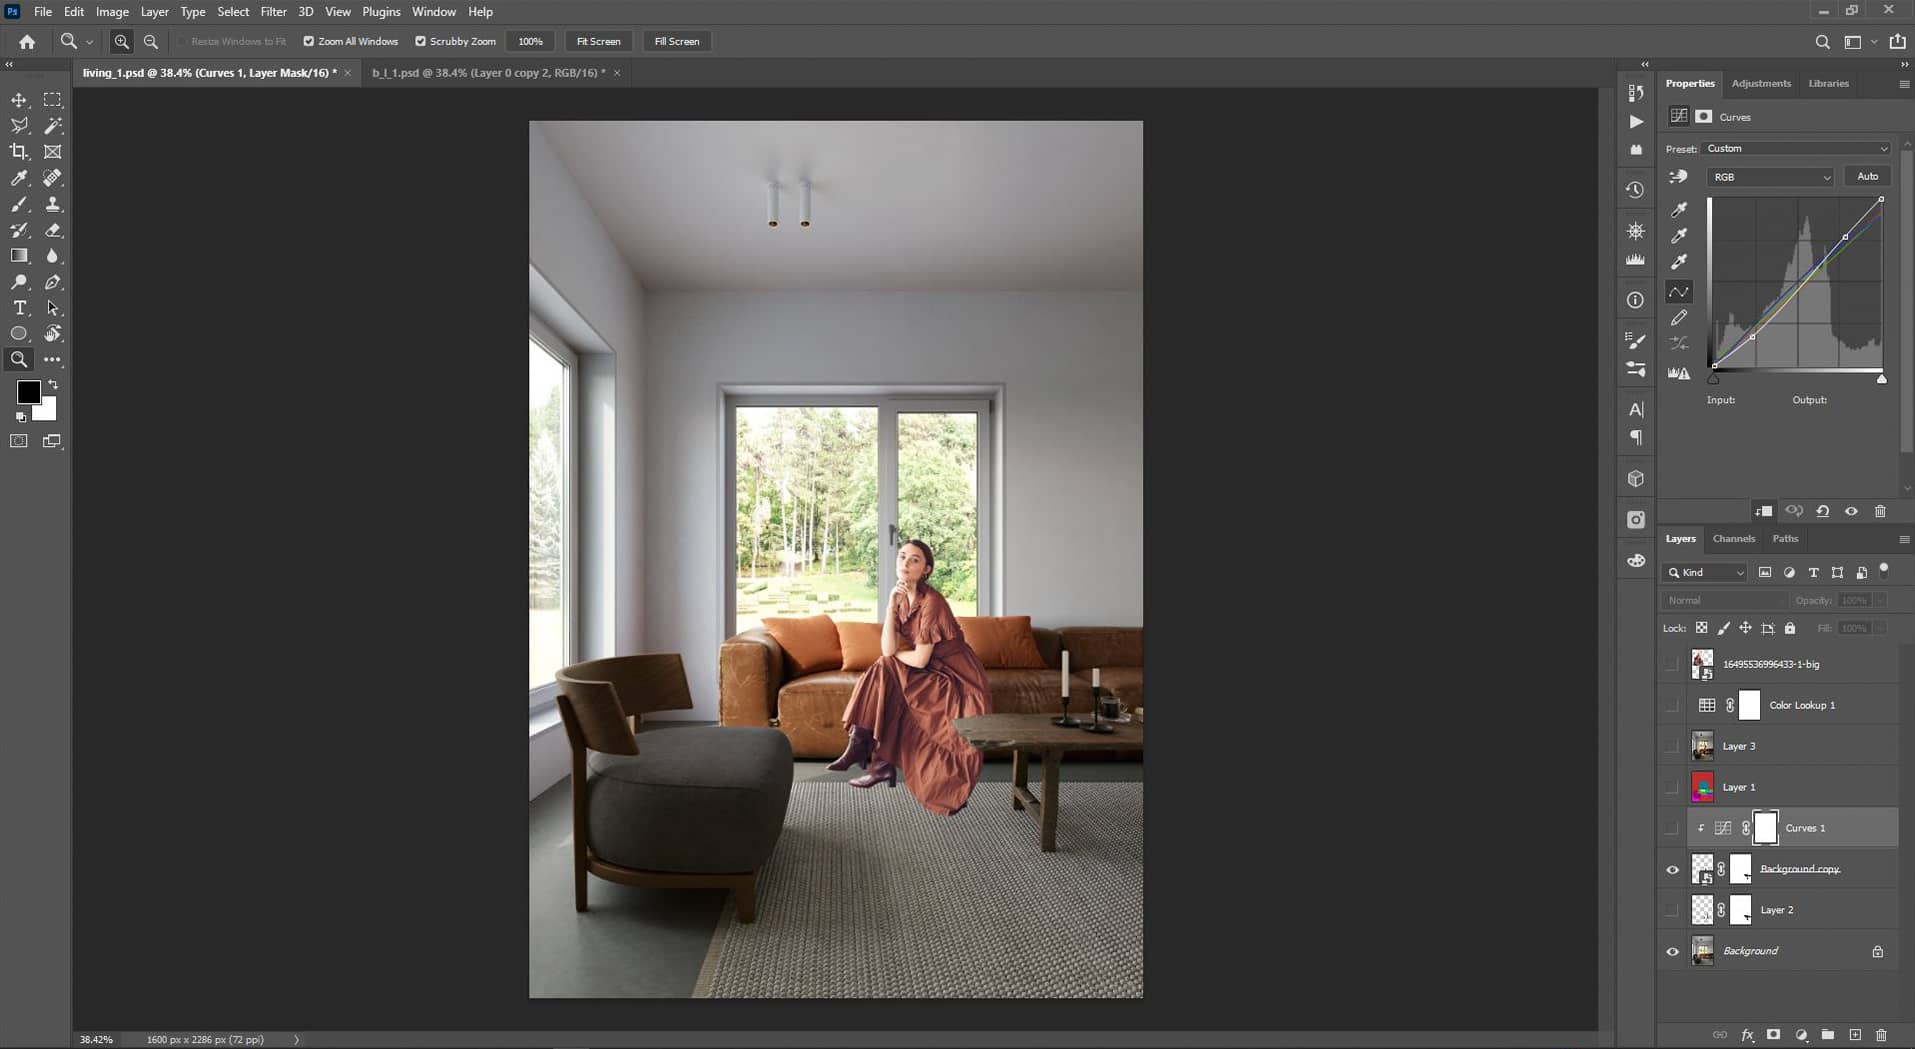
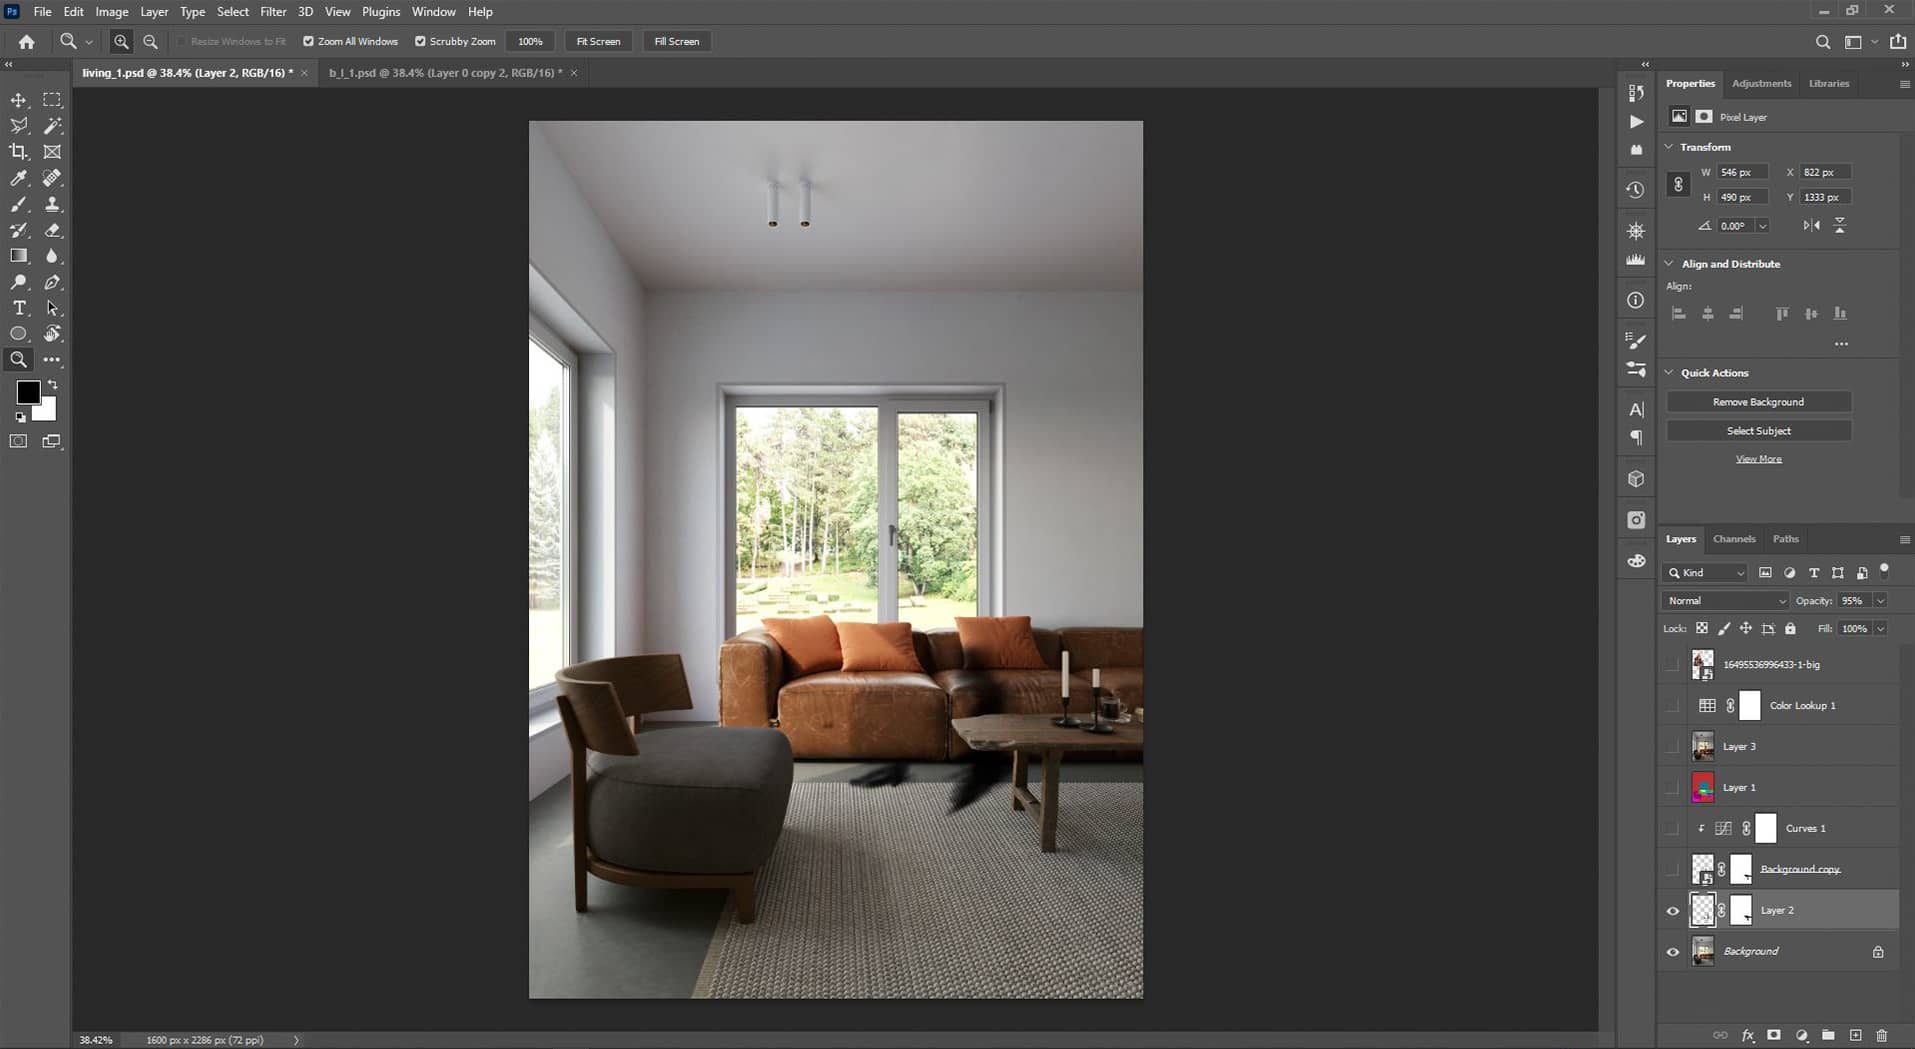
Usually, I don’t use 2d or 3d people in my scene, but this time I used 2d people. I am not an expert in Photoshop for this type of work but I tried a little. First, remove the background from the image then match the color with the background using curve adjustment. If you want to know how to match the subject color with the background try this quick tutorial. It's very useful!
Matching subject color with a background:
After matching the color, I painted some shadows under the actor, and then I applied the same camera raw filter as I did previously. My subject-matching process:
Summary.
Finally, I would like to thank both RebusFarm and VWArtclub for giving me the wonderful opportunity to write the making-of article and show everyone how I created this scene.
That’s it, I hope you found some useful tips through my workflow and if you have questions feel free to knock me out using the links below. Thanks again & Keep Rendering!
Kind regards,
Md Zahedul Alam.
Check more of Zahedul's work on these channels:
Want to share your work with our community too?
Contact us at Cette adresse e-mail est protégée contre les robots spammeurs. Vous devez activer le JavaScript pour la visualiser. and tell us about your favorite project.